Setting Up the Microsoft Deployment Toolkit

A couple of months ago I started a new job. I've fled the MSP space, and am now working as a server engineer for a company that does call centre outsourcing. Multiple sites on different continents, server clusters, thousands of users. In short, a totally different ballgame. I'll be trying to get more stuff up on here about the projects I'm working on as there is some pretty interesting stuff to talk about.
For today I'm documenting how I've gone through the process of setting up and configuring a MDT/WDS (Microsoft Deployment Toolkit/Windows Deployment Services) solution for my local site. One of our other offices has a process whereby they install Windows 10, clean it up, install required apps, sysprep and take an image. I can remember doing similar back when I worked as a school IT tech and it was painful. Time consuming and prone to driver based ball-aches, plus you had to redo the image to update anything. Following on from that we started using a MDT system which was a revelation.... This was a fair while ago however, so I've had to sit down and suss it all out from scratch, and now I'm brain dumping should I need to do it again. This will cover setting up MDT as we already had WDS set up. It isn't a big job and I may come back to it at some point.
Setting Up The Server
The first thing you'll need is a server. I used a fresh build of MS Server 2019 running on our Hyper-V cluster. 8GB of RAM, a couple of cores, 127GB drive for the OS and a dynamically expanding 500GB drive for data. I'm going to assume you can work this bit out for yourself, else you probably wouldn't be reading this.
Secondly you'll need to download and install Windows ADK from this Microsoft site. In typical MS fashion, the version names are somewhat confusing so I just downloaded the newest version. Seems to work! You'll need to install "Deployment Tools" and "User State Migration Tool". I just went with the defaults.
Next you're going to download and install the Microsoft Deployment Toolkit. As before, newest version, x64. Once this installed you should be ready to start tinkering.
Finally, download and install the WinPE add-on for the ADK from the same site. Don't forget this bit. I did when I was setting MDT up in my test environment and shockingly enough, things don't work....
Open up your newly installed MDT Deployment Workbench, select "Deployment Shares" and then click "New Deployment Share".
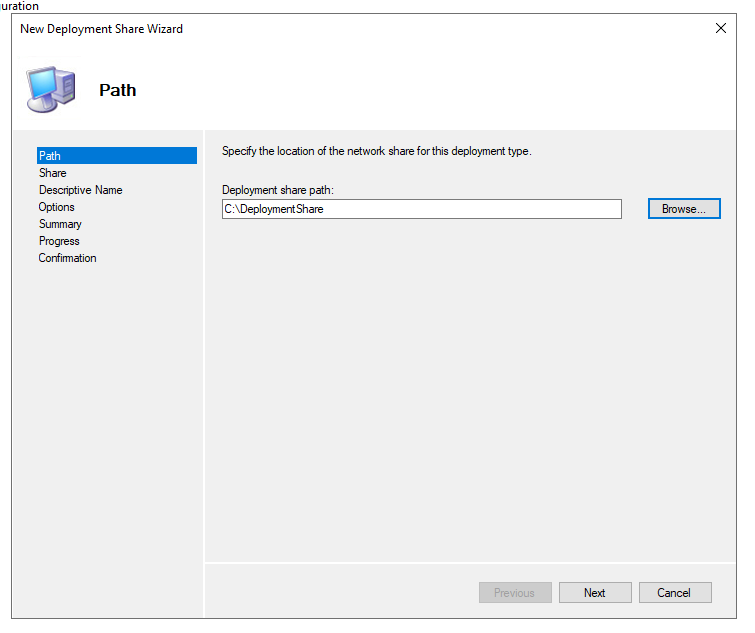
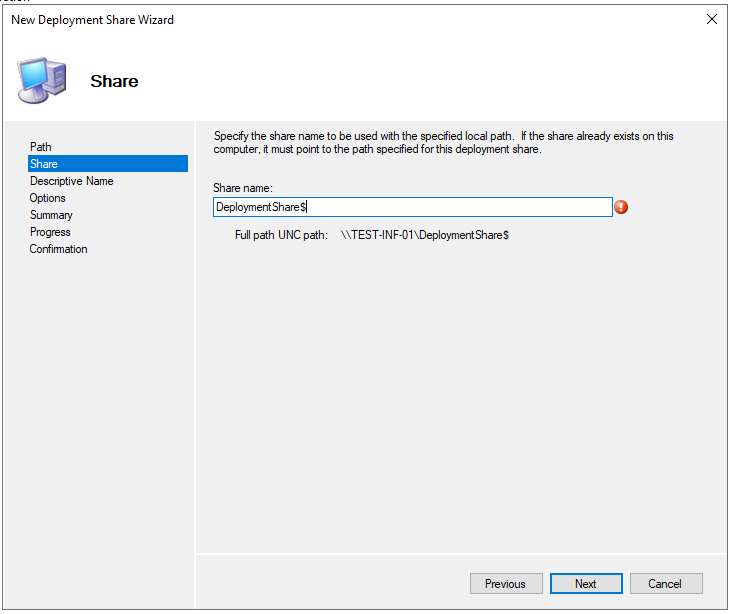
As I mentioned above, I created an extra harddrive for data and one of the uses (besides .ISO images, etc.) is said share. So, your path is D:\DeploymentShare (feel free to choose your own adventure here if you're planning on multiple shares), your share name is DeploymentShare$ (to create a hidden share), Next, Next, blahblah, Finish. Done.
You will have issues with the permissions on the share with its default settings, so have a look at the script on this post to correct things - https://www.deploymentresearch.com/fixing-mdt-2013-update-1-deployment-share-permissions-using-powershell/. Here's my tweaked version for reference:
# Check for elevation
Write-Host "Checking for elevation"

If (-NOT ([Security.Principal.WindowsPrincipal] [Security.Principal.WindowsIdentity]::GetCurrent()).IsInRole(`
    [Security.Principal.WindowsBuiltInRole] "Administrator"))
{
    Write-Warning "Oupps, you need to run this script from an elevated PowerShell prompt!`nPlease start the PowerShell prompt as an Administrator and re-run the script."
    Write-Warning "Aborting script..."
    Break
}

# Configure NTFS Permissions for the MDT Build Lab deployment share
$DeploymentShareNTFS = "E:\DeploymentShare"
icacls $DeploymentShareNTFS /grant '"Users":(OI)(CI)(RX)'
icacls $DeploymentShareNTFS /grant '"Administrators":(OI)(CI)(F)'
icacls $DeploymentShareNTFS /grant '"SYSTEM":(OI)(CI)(F)'
icacls $DeploymentShareNTFS /grant '"Test01\MDT_Share":(OI)(CI)(M)'
icacls $DeploymentShareNTFS /grant '"Test01\MDT_DA":(OI)(CI)(F)'

# Configure Sharing Permissions for the MDT Build Lab deployment share
#$DeploymentShare = "\\10.10.10.3\deploymentshare$"
Grant-SmbShareAccess DeploymentShare$ -AccountName "EVERYONE" -AccessRight Change -Force
Grant-SmbShareAccess DeploymentShare$ -AccountName "Test01\MDT_Share" -AccessRight Change -Force
Revoke-SmbShareAccess DeploymentShare$ -AccountName "CREATOR OWNER" -Force
Importing Windows 10
This next step is one of the main bits I wanted to document as it's a bit of a pain in the arse. Microsoft offer a lovely utility for downloading and creating Windows ISO files and bootable USB keys. Unfortuately as standard, the ISO you get from this isn't the full fat version, it's a helpfully compressed version to save bandwidth, however MDT doesn't like it. The way around this is to use Chrome to convince the Microsoft website that you're not using a Windows device. In Chrome go to the download site and press F12 to open the developer tools. Then click on the Device Toggle button until the site displays as an iPhone or similar.

Refresh the page and you should be presented with the option to download an ISO. Select your edition, select the language (English International if you're in the UK. You'd think the clue would be in the name, but that's a rant for another time...), 64 or 32 bit (64 bit obvs) and away you go. You should be presented with a rather larger ISO file than you would get through conventional methods. I saved this in my Data drive as mentioned above. Mount the image so your computer sees it as a drive.
Go back to your MDT Deployment Workbench, expand your deployment share, and then right click on Operating systems. and select "Import Operating System". For "OS Type" choose "Full set of source files", Next, select the root of your mounted disk image. Give your image folder a suitable name (e.g. Win10Pro21H1), Next, Next, Finish. You'll be presented with a selection of different Windows 10 versions. I deleted all of these except Windows 10 Pro.
Creating A Task Sequence
Next up is the wizard telling MDT what to do with the image file. Right-click Task Sequences, select New Task Sequence and click through the wizard. For testing purposes you can just keep it basic. The Task Sequence ID needs to be something fairly straight forward to type as you'll need it later if you want to configure a rule on the share to automatically launch a given sequence. for the Template just keep the default "Standard Client Task Sequence", select your OS (if you're following this to the letter you should just have one option), Do not specify a product key at this time (the only reason I can think of to add one is if you have a volume license), OS Settings - pretty obvious, same with the admin password, click, click done. Obviously this is just a basic config and you can do all sorts of fancy things if you choose to do so.
Updating the Deployment Share and Adding a Boot Entry to WDS
The final part of this setup process is creating and sharing your boot wim file. Right click on your deployment share, select "Update Deployment Share", select "Completely regenerate the boot images", next next next and go make your self a coffee as this will take quite a while, especially the first time it runs.
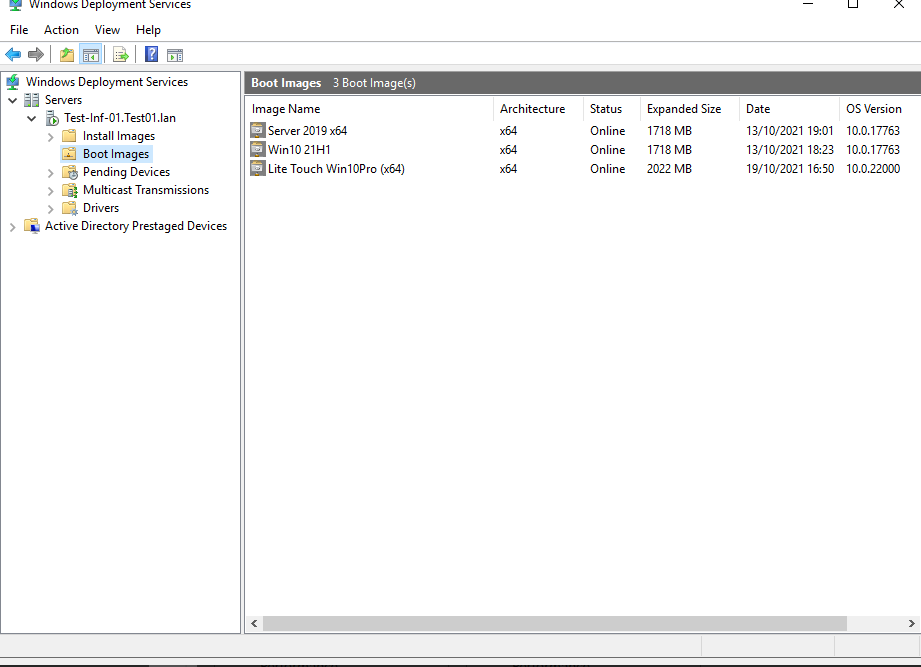
When the build process is complete you need to open Windows Deployment Services, navigate to your server in the console, right click Boot Images, Add Boot Image... and browse to the network location of your x64 litetouch wim file (\\yourserver\yourdeplymentshare$\boot\LiteTouchPE_x64.wim), name it, next finish.
If everything has gone according to plan you should now be able to PXE boot a computer, and select your MDT image. There are a bunch of rules you can add to the deployment share properties to totally automate the install and I'm intending to cover these in a separate post.